

In this article, we will cover
- APIs
- Django REST APIs
- HTTP methods and
- Create our very own first REST API application.
What is an API?
API is short for Application Programming Interface and it allows you to interface with other applications and pull/process/push data and values when required.
To simplify, in an API, we take in some data as a request from the client, process it, and then send something back to them.
Eg: In a Facebook search, here the client, i.e., the user sends a profile request, and the server then browses its database for the profile and returns them with the list of profiles( with that name).
CRUD operators and HTTP methods
While using an API, they can send requests to the server in many different ways according to its needs. These different types are called CRUD(create-retrieve-update-delete)
We have corresponding HTTP methods for each operation. We learned about POST and GET in Django Forms; we will now learn about the others.
GET – Pull specific information from the web server (just to view it).
POST – Add new information into the DB present in the server.
PUT – Edit already present information or add new information if not present already.
DELETE – Delete information from the DB present in the server.
We will understand this using the following example:
Let’s say we have a DB containing various items like chairs, tables, etc
using GET: gives us just the list of items to view
Using POST: (along with the information about a new item) adds that item to the DB.
Using PUT: (along with the information about the chair), will update the information for the already present chair. If it was not present before, then it will just create one.
Using DELETE: will just delete the particular item that we want.
What is the REST API?
A REST (REpresentational State Transfer) API is similar to the standard API. We send the server a request. But the server doesn’t respond with data, it responds with resources.
Resources are data, but the way of thinking of data here changes.
Resources are similar to Object-Oriented Programming.
That is, for e.g.:
Consider a URL endpoint item/chair
Here, we can have four different functionalities with the same endpoint.
GET item/chair: Gets the list of items
POST item/chair: Creates a new item chair
PUT item/chair: Updates/edits the information about the chair
DELETE item/chair: Deletes Chair from items
Hence this can be thought of as an Item resource.
Therefore, now we can think of our interaction with the server as not with individual endpoint requests but with resources(having the same endpoint for different functionalities)
Also, another feature of Rest API is that it is stateless. I will explain this with an example.
If we post data about a new item chair, the server will add this information to the DB. Once added, the server forgets about it.
Now, if I hit the server with a GET request for that chair, the server will not remember that we just saved it in the previous interaction. It will again go back to the DB and search for an item named chair and then return the information.
After returning the information, it will again forget about it.
Use of JSON in Client-Server API Interaction
APIs use JSON text for accepting and returning requests. That means, when you search Twitter for a particular tweet, you send the request to the server as a JSON. After processing it, the server sends back the Response again as a JSON text.
This JSON response is converted to a readable format for the user.
The real exchange of information between the FRONT-END and BACK-END server in API happens using JSON text.
JSON text looks just like the Python dictionary.
{“item”:
    { “chair”: {
        “Price”:120,
        “Color”: 'red',
        },
    }
}
Installing DRF-Django Rest API Framework
Now to use Django REST API, we have an entire framework called the Django Rest framework.
We need to install that into our environment with the use of the pip command, just like how we installed Django.
So in your shell type:
pip install djangorestframework
Installing POSTMAN
POSTMAN is an easy-to-use platform for API development. Postman’s features simplify each step of building an API and streamline collaboration so you can create better APIs—faster.
To download Postman,
Go to the browser and search POSTMAN download.
Click the first link
Download the Free version of POSTMAN
Follow the steps to install it.
That’s it. We are ready to go.
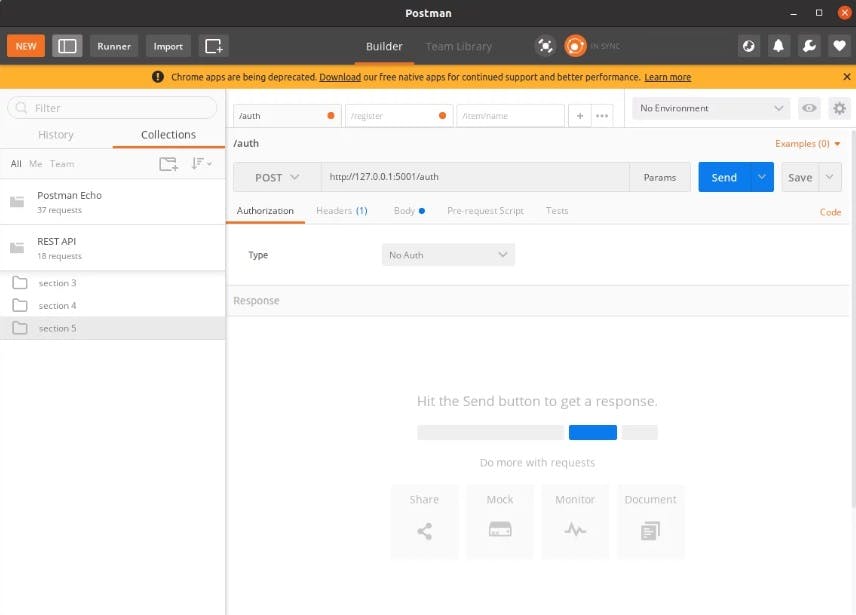
It will look like this once you download and install it into your system
Creating a new Django REST API application
Now let us make a Django REST API application in which you can see, add, update, and delete items in a list
Create a new application named ITEM APP
In models.py create a model
Postman hits
1. Create a new Django app – itemsapp
Create a new Django app in our project with the name “itemsapp” using the way we learned in Django Hello World App.
django-admin startapp itemsapp
After creating the app, go one to perform the basic steps:
map urls.py in the project to that of app
add app name in settings.py
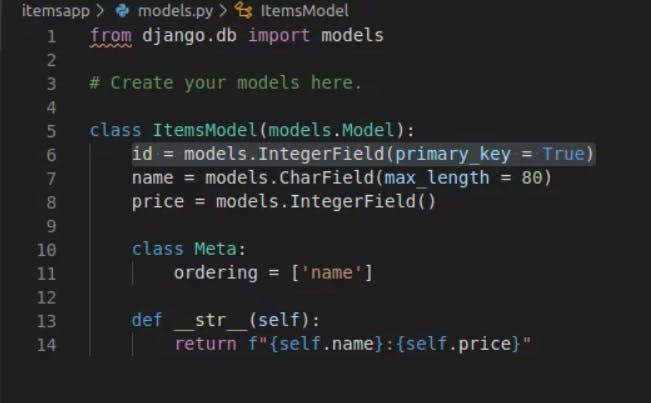
2. Create a model item Model having the list of items in it.
In models.py, create a model having all the necessary information needed for an item as shown.
class ItemModel(models.Model):
    id = models.IntegerField(primary_key = True)
    name = models.CharField(max_length = 80, blank = False)
    price = models.IntegerField

    class Meta:
        ordering = ['name']

    def __str__(self):
        return f"{self.name}:{self.price}"
Now that our model is ready, we will learn about a new thing called.
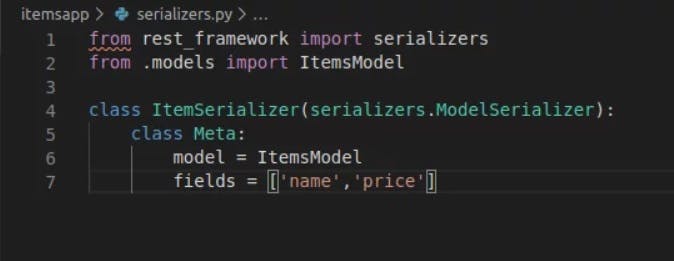
3. Creating Serializers.py file in our App
Now since APIs deal with JSON text, whenever we will give information from our DB to the users, we need first to convert it into JSON and vice versa.
So for that, we need a serializers.py file. In your application, create a new file “serializers.py” and add the following information to it.
from rest_framework import serializers
from .models import ItemModel

class ItemSerializer(serializers.ModelSerializer):
    class Meta:
        model = ItemModel
        fields = ['id',name','price']
Here we are linking the serializer to the model since we need to convert the DB data into JSON before sending it to the user. So basically a serializer works as both serializer(converting DB information into JSON) and a de-serializer (Converting user-given JSON into Django readable syntax).
We will learn more about how serializers work while we create the View.
4. Creating an API View for viewing a list of items
Now in Views.py, add the following code:
from django.shortcuts import render,HttpResponseRedirect,Http404
from rest_framework.parsers import JSONParser
from django.http import HttpResponse,JsonResponse
from django.views.decorators.csrf import csrf_exempt
from .models import ItemsModel
from .serializers import ItemSerializer
# Create your views here.
We will be needing all the above imports to write the API views.
Now we will write ItemsView, which will show us the list of items present in the DB when using the GET method and lets us add new items to the list when using the POST method.(endpoint: items/)
So add the below code to views.py file
@csrf_exempt
def ItemsView(request):

    if request.method == 'GET':
        items = ItemsModel.objects.all()
        serializer = ItemSerializer(items, many =True)
        return JsonResponse(serializer.data, safe =False)

    elif request.method == 'POST':
        data = JSONParser().parse(request)
        serializer =ItemSerializer(data = data)

        if serializer.is_valid():
            serializer.save()
            return JsonResponse(serializer.data,status =201)
        return JsonResponse(serializer.errors,status = 400)
Here
@csrf_excempt is a decorator similar to the {% csrf_token %} that we learned in Django Forms. This decorator ensures that any forgery doesn’t happen with the information that is passed on.
Now, if the request is GET, then we store all the objects present in the DB in the items variable.
Then we convert the particular information (stored in items) into JSON format using a serializer. Since we have taken all the objects from the DB, set many to TRUE.
Once the information is converted to JSON, we return the appropriate JSON response.
In the POST method, since the information that the user will send, will be in JSON format, we need to convert it into correct Python-Django readable syntax.
So we use JSON parser to parse the request to get data related to the new item and then store it in the variable data.
Then we use a serializer to convert the parsed JSON text that we got from the request into python readable syntax.
Now, if the parsed serialized data is valid, then we save it otherwise show an error message.
Now we will add another API View ItemView(endpoint: item/<int: id>), which will show us a particular item in the GET request. We will be able to change the information using the POST request and delete it using the DELETE request.
In the same views.py, add the following code:
@csrf_exempt
def ItemView(request,nm):
    try:
        item = ItemsModel.objects.get(id = nm)
    except ItemsModel.DoesNotExist:
        raise Http404('Not found')

    if request.method == 'GET':
        serializer = ItemSerializer(item)
        return JsonResponse(serializer.data)

    if request.method == 'PUT':
        data = JSONParser().parse(request)
        serializer = ItemSerializer(item,data =data)

        if serializer.is_valid():
            serializer.save()
            return JsonResponse(serializer.data)
        return JsonResponse(serializer.errors, status =400)

    if request.method == "DELETE":
        item.delete()
        return HttpResponse(status =204)
Here,
We are again using the @csrf_exempt, decorator just as before.
Inside the function, we will first try to get the item (from the DB) with the id, used in the endpoint.
If no such item exists, we will raise an Http404(not found) error.
If the method is GET, we will convert the item information from DB into JSON format using a serializer and then return the JSON response to the user.
If the method is PUT, we will parse the request to get the JSON data from it, and send it to the serializer to convert it into Python readable syntax.
Note that in serializer, we need to pass items as well, along with the parsed data since Django needs to know which item from DB needs to be updated.
If the method were DELETE, we would delete the particular item from the DB.
That’s it, guys !! Don’t worry if you have some difficulty understanding serializers; you will get the hang of it after practicing it for some time.

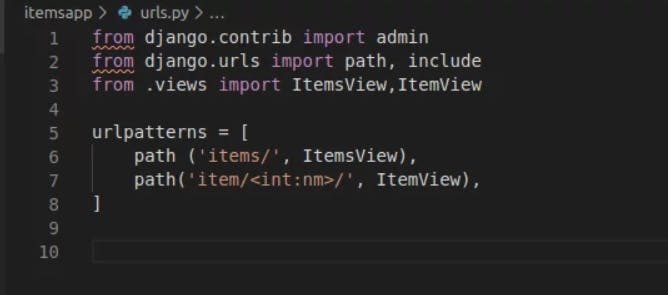
Now we will modify our urls.py to accommodate the two Views
5. Creating URL mapping for the two Views in urls.py
In urls.py add the path function to link the two API Views to their appropriate endpoints. Therefore, in urls.py add
path ('items/', ItemsView),
path('item/<int:nm>/', ItemView),
We learned to map URLs in Django URL mapping.
Also, register the model into the admin site as learned in the Django Admin site using the code below.
admin.site.register(ItemModel)
That’s it. Now we need to make migrations to create ItemModel Table in the DB. So in the Shell, enter:
python manage.py makemigrations
python manage.py migrate
Now once the table is created, we are ready to run the server
python manage.py runserver
Go to the admin site and add a few elements to the ItemModel we just created
Using POSTMAN to view the Endpoints
Let’s make use of the POSTMAN API development environment that we downloaded and installed earlier.
1. GET items/
Now in the search URL, enter the URL “hostwebsite/items” and in the left, keep the method to GET.
Hit send and observe below:
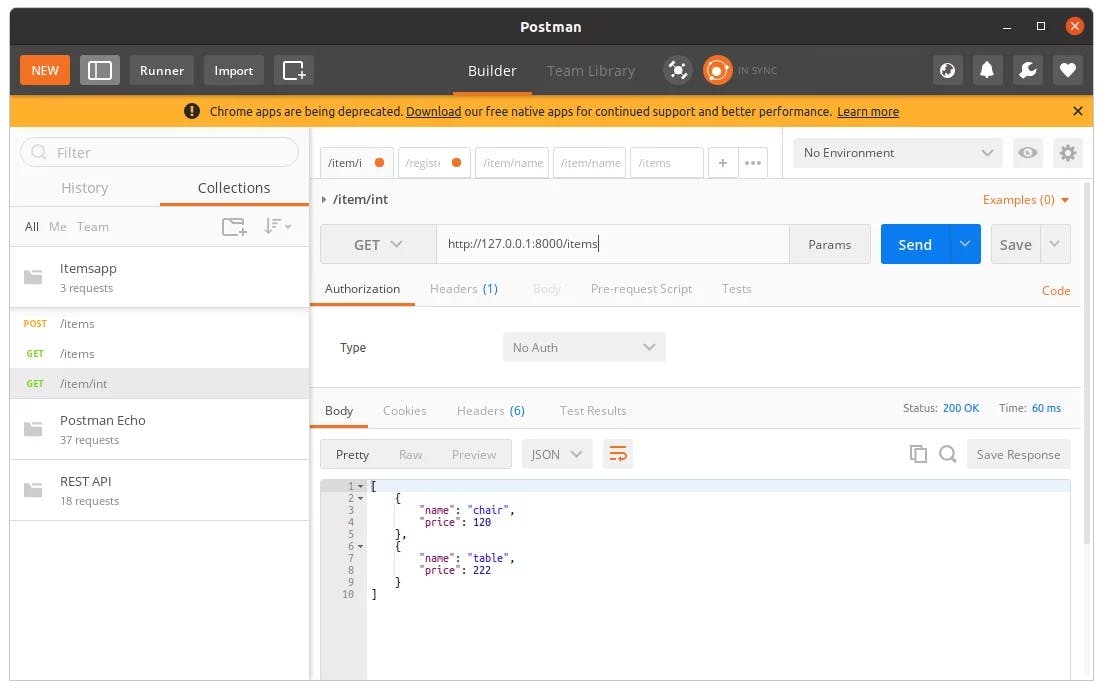
GET Items
We got the information about the list of items present in the DB.
2. POST items/
Now below, you will see a body option. Go there and choose the text to be JSON and in the place given below, enter the information about an item you want to add.
Now change the method from GET to POST and then hit send
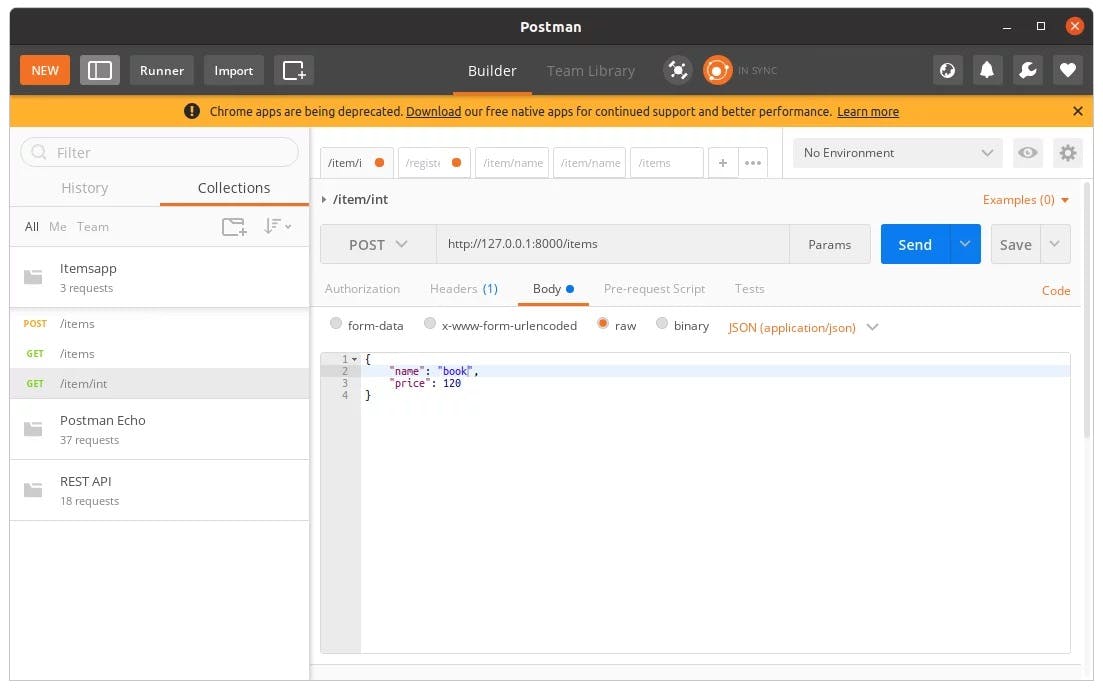
POST Items
The item has now been included in the DB.
3. GET item/id
Now, in the search URL, go to endpoint item/<id\> and enter the id you want. Keep the method to GET and hit send.

GET Item
You will the information about that particular item.
4. PUT item/id
Again like in the POST option, write the information about a pre-existing item and then change the method to PUT and hit send.

PUT Item
You will see that the information has been updated
4. DELETE item/id
Now, change the method to DELETE, and hit send
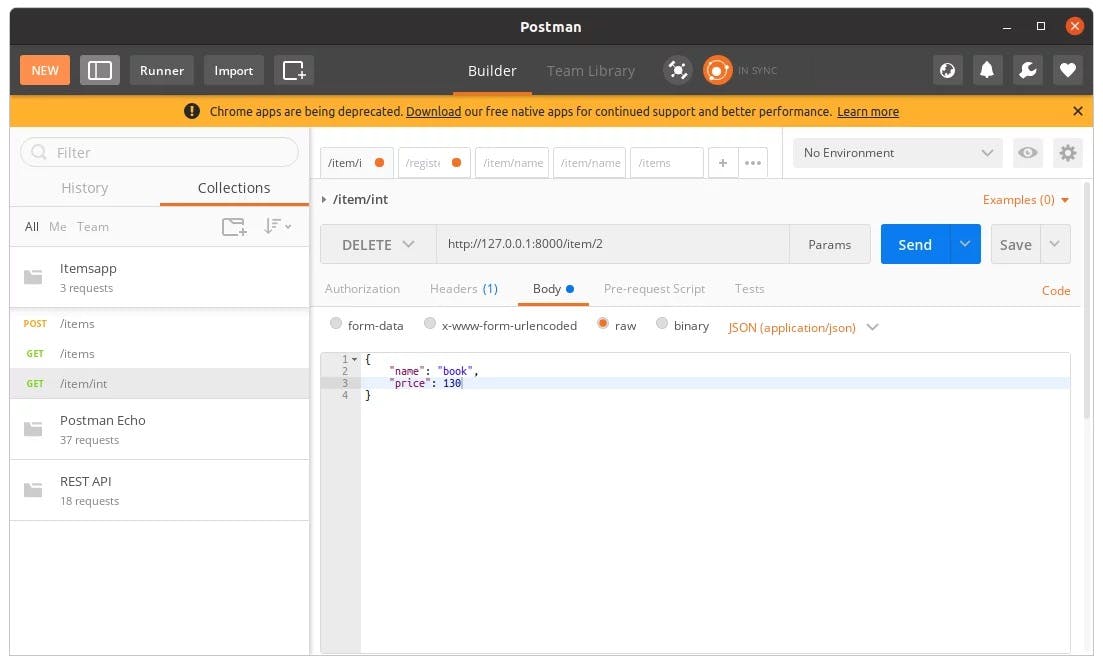
DELETE Item
You will observe that now the particular item has been deleted.
Conclusion
The above article explains about Django REST API tutorial.
Also, you can learn more about the Django REST Framework from the official documentation